Table of Contents
So, you have stablecoins on Ethereum but want to dive into the fast, low-cost world of Solana's DeFi ecosystem. To get there, you'll need to "bridge" your assets. At its core, this means locking up your ERC-20 stablecoin on Ethereum to mint an equivalent token on Solana.
The two main routes are using a decentralized cross-chain bridge (like Wormhole) or a familiar centralized exchange (CEX) that supports both networks.
Why Bridge Stablecoins Between Ethereum and Solana
Moving your assets from one blockchain to another might sound technical, but the reason is simple: opportunity. Ethereum is the king of DeFi, but its popularity often leads to sky-high transaction fees (gas). These costs can turn a small trade or yield farm deposit into an unprofitable venture.
Enter Solana. It was built from the ground up for speed and efficiency, with transaction costs that are fractions of a penny. This makes it the perfect environment for activities like yield farming on Raydium or liquid staking with Marinade Finance.
Bridging your stablecoins allows you to put your capital to work in this high-speed, low-cost playground without letting Ethereum's gas fees eat into your profits.
Comparing Your Bridging Options
When you're ready to move your stablecoins, you have a fundamental choice to make. Do you go the decentralized route or stick with a centralized platform? Let's break down the real-world differences.
Choosing the right method depends entirely on what you value most: control, convenience, speed, or cost. For a quick snapshot, here’s how the main options stack up.
Comparing Stablecoin Bridging Methods
| Method | Typical Speed | Estimated Cost | Security Model | Best For |
|---|---|---|---|---|
| Decentralized Bridge | 5-20 minutes | Moderate (Gas + Bridge Fee) | Trustless (Smart Contracts) | DeFi natives who want to keep self-custody. |
| Centralized Exchange | Variable (10 min - 1 hour+) | Low (Withdrawal Fee) | Custodial (Trusts the Exchange) | Beginners or those who prefer a guided process. |
Let's dig a little deeper into what these options mean for you.
Decentralized Bridges (e.g., Wormhole): These are my go-to. They are non-custodial protocols that operate via smart contracts. You lock your ERC-20 tokens on Ethereum, and the bridge mints a "wrapped" version on Solana. The key here is that you always maintain control of your assets with your own wallet. This is the path for anyone who lives by the "not your keys, not your crypto" mantra.
Centralized Exchanges (CEXs): This is often the more straightforward path. You simply deposit your ERC-20 stablecoin into your exchange account, then withdraw it to your Solana wallet, making sure to select the SPL network option. While it's user-friendly, you are temporarily giving up custody of your funds to the exchange. It also usually requires a full KYC (Know Your Customer) process.
The choice between a bridge and a CEX really comes down to a trade-off between control and convenience. If keeping full control of your private keys is non-negotiable, a decentralized bridge is the clear winner. If you'd rather follow a simpler, more guided process and don't mind the custody risk, a CEX is a great choice.
The need for these cross-chain transfers has exploded as both ecosystems have matured. While Ethereum still holds the lion's share of stablecoin supply, Solana is rapidly gaining ground, turning bridging into a mission-critical piece of crypto infrastructure. Wormhole’s Portal Token Bridge alone has facilitated billions of dollars in asset movement. You can dive into some fascinating data on this trend in this market share analysis.
Understanding these two approaches is the first real step. Your decision here will impact the fees you pay, the exact steps you’ll take, and the security model you're trusting before a single dollar moves from your Ethereum wallet to its new home on Solana.
Getting Your Wallets Ready for the Bridge
Before you can even think about moving stablecoins from Ethereum to Solana, you need to get your digital house in order. A successful transfer starts with setting up your wallets correctly. This isn't just about downloading an app; it's about making sure they're funded and ready to go, so you don't hit frustrating roadblocks later.
Think of it as prepping for a road trip. You wouldn't leave without gas in the tank or checking your tires, right? The same logic applies here.
For this specific journey, you’ll need two key tools: an Ethereum-compatible wallet like MetaMask and a Solana wallet, with Phantom being the most popular choice. Your MetaMask wallet will be where you send from, and Phantom will be where you receive.
Don't Get Stuck: Funding for Gas Fees
The number one mistake I see people make is forgetting about network fees, or "gas." Both blockchains need their native token to process anything. Without it, your transaction is dead in the water.
On the Ethereum side (MetaMask): You absolutely must have some ETH in your wallet. This covers the gas fee for the first part of the bridge transaction. Ethereum gas fees can be notoriously unpredictable, so it's smart to have more than you think you'll need. I always keep at least $20-$50 worth of ETH on hand for any DeFi moves, just to be safe.
On the Solana side (Phantom): You'll need SOL in your Phantom wallet. The good news is Solana's fees are incredibly cheap—often less than $0.01. However, you’ll need it for future steps, like swapping the bridged stablecoin into a native Solana version. Sending over 0.05 SOL is a great starting point and will cover dozens of transactions.
My Pro Tip: If you're funding your wallets from a crypto exchange, always send a tiny test amount first. This confirms you have the right address before you move the full amount. Trust me, paying a small gas fee for a failed transaction is a headache you can easily avoid.
Making Sure Your Ethereum Wallet is Good to Go
It’s not enough to just have stablecoins sitting in your MetaMask. The wallet needs to actually recognize the specific token you plan on moving. For example, if you're bridging USDC, you have to make sure the official USDC token contract is added to your wallet's asset list.
Sometimes your balance won't show up automatically. If that happens, here's how to add it manually:
- Open MetaMask and look for the "Import tokens" link.
- Grab the official contract address for your stablecoin from a trusted source like Etherscan or CoinGecko. Don't just Google it and copy the first result!
- Paste that address into MetaMask. The token symbol and decimals should fill in on their own. Click "Add Custom Token."
Doing this lets you see your balance and gives you confidence that you’re approving the right asset when you connect to a bridge. It also prevents that heart-stopping moment of "Where did my money go?" after a transaction. If you're just trading stablecoins on one network, our guide on how to swap stablecoins has some great tips for managing those assets.
Prepping Your Solana Wallet to Catch the Funds
Setting up your Solana wallet is usually a bit simpler, but it's just as important. The main thing here is getting your receiving address right. In Phantom, this is the long string of letters and numbers at the top of the wallet window.
When you get to the part of the bridging process where you enter a destination, double-check that address. Then, triple-check it. Sending crypto to the wrong address is a one-way ticket to losing your funds forever.
By getting your wallets funded for gas and properly configured ahead of time, you’ve already sidestepped 90% of the things that can go wrong. Now you’re ready for the actual bridge.
A Practical Walkthrough Using the Wormhole Portal Bridge
Alright, with your wallets prepped and funded, let's get down to the real work: moving your stablecoins across chains. For this hands-on guide, we’ll be using one of the most well-known decentralized options out there, the Wormhole Portal. I'll walk you through the process, screen by screen, so you know exactly what to expect.
The beauty of a non-custodial bridge like Wormhole is that your funds are never held by a third-party exchange. The assets move directly between your own wallets, which is a huge plus for anyone who prioritizes self-custody.
This simple graphic highlights the two most critical prerequisites. You absolutely need some ETH in your Ethereum wallet and some SOL in your Solana wallet before you even start.
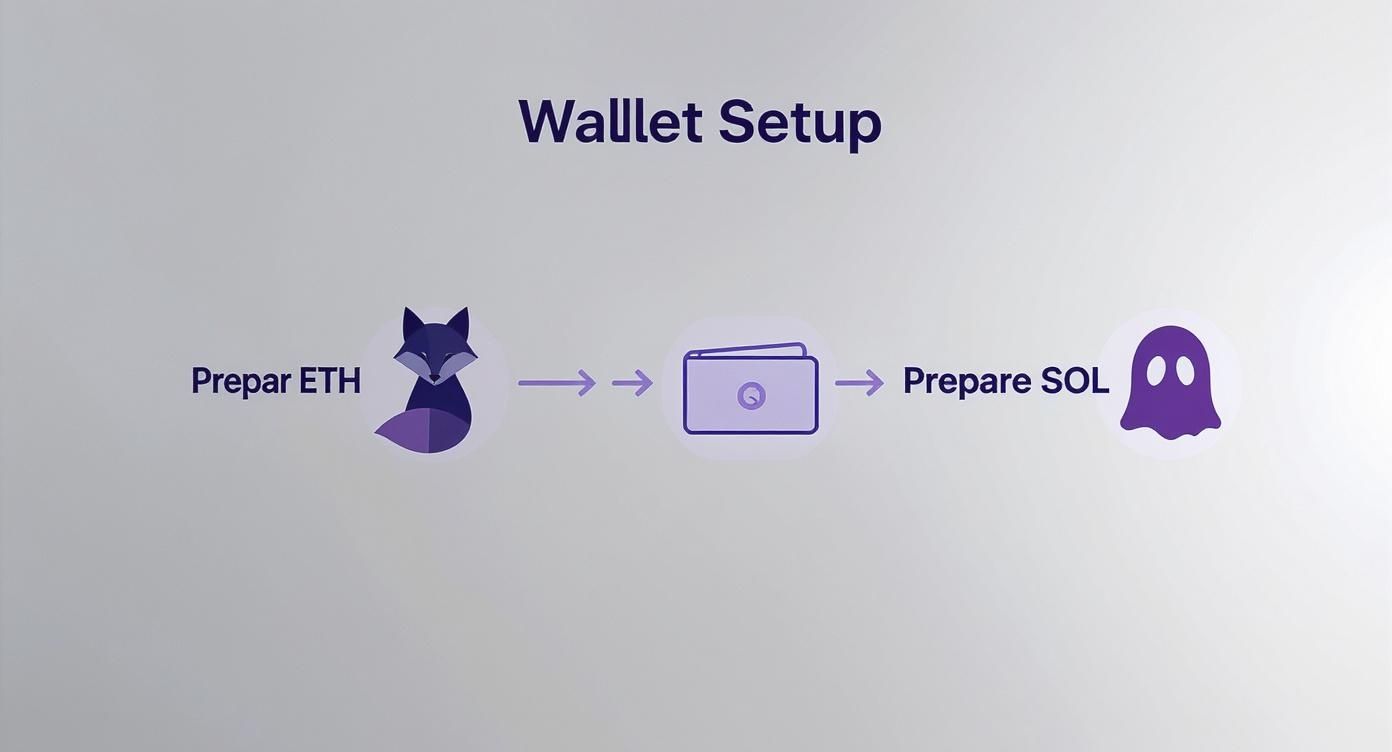
Think of these native tokens as the fuel for your cross-chain journey. They cover the gas fees on both sides of the bridge, and without them, your transaction is dead in the water.
Getting Your Wallets Connected
First things first, head over to the official Wormhole Portal website. I can't stress this enough: triple-check the URL. Phishing sites are rampant in crypto. Once you're on the legitimate site, you'll find a straightforward interface asking where your funds are coming from and where they're going to.
You'll need to link up both of your wallets to the site.
- For Ethereum: In the "From" section, hit "Connect" and choose MetaMask from the list. Your wallet will pop up asking for permission to connect to the site—go ahead and approve it.
- For Solana: Now, do the same thing for the "To" section, but this time select Phantom (or whichever Solana wallet you're using). You'll get a similar connection request to approve.
Once both wallets are linked, the Portal can read your balances and prepare to execute transactions on your behalf.
Setting Up and Kicking Off the Transfer
With your wallets now talking to the Portal, it's time to tell it exactly what you want to do.
In the "From" section, make sure Ethereum is selected. Then, click "Select a token" and find the stablecoin you want to move, like USDC or USDT. Punch in the amount you want to send.
My Personal Tip: If this is your first time using any bridge, always start with a small test transaction. Seriously. Sending just $10 or $20 first is a tiny price to pay for the peace of mind that comes from knowing the entire process works as expected before you send a larger amount.
The interface will update to show you the estimated amount you'll receive on Solana after any fees. If everything looks good, click "Next."
This next part involves two separate transactions you'll need to approve in MetaMask. This is a standard security measure for most DeFi protocols.
- Token Approval: The first transaction is just giving the Wormhole smart contract permission to interact with your stablecoins. MetaMask will pop up, you'll pay a small gas fee in ETH, and you're giving the green light for the bridge to access the specific amount you entered.
- The Actual Transfer: After the approval is confirmed on-chain (this can take a minute or two), the "Transfer" button will light up. Clicking this initiates the main event. It locks your ERC-20 stablecoins in the Wormhole contract and requires a second, usually larger, gas fee.
Tracking the Bridge and Receiving Your Funds
Once you’ve confirmed that second transaction in MetaMask, your part on the Ethereum side is done. The bridging process is officially in motion. Wormhole takes your locked Ethereum assets and starts minting an equivalent "wrapped" version over on Solana.
This isn't instant, so be patient. You can expect the process to take anywhere from 5 to 15 minutes, sometimes longer if either network is heavily congested. The Portal itself provides a handy status screen with links to the transaction on both Etherscan and Solscan.
I always recommend clicking those links and watching the transaction progress on the block explorers. It’s the best way to see what's happening under the hood and confirm each step completes successfully. It beats just sitting there staring at a loading screen.
When it's all finished, the newly minted wrapped stablecoins will show up in your Phantom wallet. For instance, if you sent USDC, you might see a token called "USDC (Portal)". That "(Portal)" tag is your clue that it's a Wormhole-wrapped asset, not a native Solana one.
This multi-step approval and transfer flow is common across the world of cross-chain protocols. If you're curious about different interoperability designs, our guide on how to bridge tokens using LayerZero offers a great look into an alternative technology.
And that's it! You've successfully moved your stablecoins from Ethereum to Solana. Your funds are now ready to be deployed in Solana's DeFi ecosystem. The next crucial step, of course, is swapping these wrapped assets for their native counterparts.
Centralized Exchanges: A Simpler Route for Your Stablecoins
While decentralized bridges are powerful, they aren't for everyone. If you're not quite comfortable interacting directly with smart contracts, there's a much more familiar path: a centralized exchange (CEX).
Think of platforms like Coinbase, Kraken, or Binance. They act as a trusted intermediary, a sort of financial hub with on-ramps and off-ramps to different blockchains. The process is surprisingly simple: you deposit your Ethereum-based stablecoins into the exchange, and then you withdraw them as Solana-native tokens to your Solana wallet.
This method completely sidesteps the complexities of trustless bridges. Instead of wrapping tokens or signing multiple smart contract interactions, you're just using the exchange's internal plumbing to do the heavy lifting for you.
How Does it Actually Work?
When you deposit your ERC-20 USDC into an exchange, you're sending it to their massive Ethereum wallet. Once it's confirmed, the exchange just updates a number in your account balance. The tokens haven't magically jumped chains; they're just sitting in the exchange's vault.
Then, when you request a withdrawal to Solana, the exchange takes native SPL USDC from its own Solana "hot wallet" and sends it to your Phantom wallet address. It's a clean, two-step process handled within a user interface you're probably already used to.
The biggest trade-off here is custody. For the brief period your funds are on the exchange, you're trusting them to keep your assets safe. This is what's known as custodial risk. You're also required to complete Know Your Customer (KYC) verification, so it's not a private option. For a deeper look at how a major CEX handles these things, our complete breakdown of Coinbase covers their security and features.
A Walkthrough: Moving USDC from MetaMask to Phantom
Let's break down the exact steps. Imagine you have USDC on Ethereum in your MetaMask and want it on Solana in your Phantom wallet.
Sending from Ethereum to the Exchange
First, you need to get your funds onto the exchange.
- Log into your exchange account and head to your wallet or deposit section.
- Find USDC (or your stablecoin of choice) and hit "Deposit."
- This is critical: You'll be asked to choose a network. You must select Ethereum (ERC-20). The exchange will then give you a unique deposit address.
- Copy that address. Pop over to your MetaMask wallet, click "Send," and paste the address in the recipient field.
- Enter the amount, confirm the details, and approve the transaction. You'll have to pay an ETH gas fee for this.
Now, you wait. Ethereum block times can vary, so this might take anywhere from 5 to 30 minutes depending on how busy the network is. Your exchange will likely show the deposit as "pending" until it has enough confirmations to be considered secure.
Once the deposit is confirmed, your USDC will show up in your exchange balance. The hard part is over. From your perspective, the funds are now off Ethereum and ready for the next leg of their journey.
Withdrawing to Your Solana Wallet
With your balance updated on the exchange, you’re ready for the final step.
- Find your USDC balance again, but this time, click "Withdraw."
- Now, open your Phantom wallet and copy your main Solana address (it starts with a string of letters and numbers).
- Paste this into the withdrawal or recipient address field on the exchange.
- Pay close attention here: When asked for the network, you must select Solana (SPL). Double-check, then triple-check this. Sending to the wrong network is the fastest way to lose your funds permanently.
- Enter the amount you want to send, review the exchange's small withdrawal fee, and submit the transaction.
Within a few minutes, you should see the native SPL stablecoins land in your Phantom wallet. You're now ready to explore the Solana DeFi ecosystem without ever having to touch a cross-chain bridge contract.
Staying Safe: Fees, Security, and Common Bridging Risks
Let’s be real: moving stablecoins between blockchains isn't free, and it’s certainly not risk-free. Before you even think about bridging from Ethereum to Solana, you need a clear-eyed view of the costs and the very real security threats involved. Getting this right will save you money and, more importantly, help you keep your assets safe.
You're not just paying one fee. You’re dealing with two different blockchains and a bridging protocol, and they all want a piece of the action.
Breaking Down the Costs of Bridging
The total cost to get your funds from A to B is a sum of several moving parts. While Solana’s fees are practically dust, Ethereum’s gas costs can sting, especially when the network is busy.
Here's what you can expect to pay for:
- Ethereum Gas Fee (Approval): First, you have to give the bridge’s smart contract permission to touch your stablecoins. That’s a transaction, and it costs ETH.
- Ethereum Gas Fee (Transfer): This is the big one. It's the fee you pay to actually lock your USDC or USDT into the bridge's contract on the Ethereum side. This is usually the most expensive part of the whole operation.
- Bridge-Specific Fee: Most decentralized bridges take a small cut, either as a percentage or a flat fee. This is how they stay in business and pay the people who help run the bridge.
- Solana Network Fee: Once your funds land on Solana, you'll need a tiny bit of SOL to do anything with them. The good news? These fees are usually less than a penny.
The Elephant in the Room: Security Risks
Cross-chain bridges are incredible pieces of technology, but they're also a massive honeypot for hackers. Because they hold so much value, they’ve been the target of some of the biggest DeFi exploits in history.
The primary danger lies in the bridge's smart contract code. One small bug can allow an attacker to mint tokens out of thin air or just drain all the locked assets on one side, making the "wrapped" token on the other chain instantly worthless. This is precisely why you must stick to reputable, heavily audited bridges.
The numbers are staggering and highlight what's at stake. On-chain stablecoin transfers have exploded, hitting records of over $15 trillion quarterly. The daily volume of stablecoins moving between just Ethereum and Solana often tops $500 million, which makes these bridges a very tempting target for bad actors. For more data on this trend, check out this Q3 2025 stablecoin report.
How to Actually Protect Your Assets
You can't eliminate risk completely, but you can dramatically reduce your exposure. It all comes down to adopting a security-first mindset every single time you bridge.
My number one rule is to always send a small test transaction first. Bridging $20 before you move $20,000 is the cheapest insurance policy you can buy. It proves the whole process works from end to end and that you didn't miss a step.
Here are a few other habits to get into:
- Use Battle-Tested Bridges: Only use protocols that have been around for a while, have multiple public security audits from reputable firms, and are trusted with a significant amount of money.
- Verify URLs religiously: Phishing sites are everywhere. Before connecting your wallet, triple-check you're on the official website. One wrong click could have you signing a transaction that drains your wallet.
- Revoke Token Approvals: Once your transfer is complete, use a tool like Revoke.cash to cancel the permission you gave the bridge's contract. This is great security hygiene and prevents a future exploit on the bridge from affecting your funds.
Ultimately, protecting your private keys is the bedrock of self-custody. To get a better handle on the wider principles of keeping your information safe, these best practices for managing secrets are a great starting point.
And for a deeper dive into how these risks are changing, our 2025 review of stablecoin bridging risks and speed covers what you need to be watching out for. If you approach every cross-chain transfer with a healthy dose of caution, you can navigate the process with confidence and keep your assets secure.
So, Your Stablecoins Are on Solana. What's Next?
Congratulations, your stablecoins have made it across the bridge from Ethereum and are sitting in your Solana wallet. The hard part is over, but there's one small—but critical—job left to do before you can really put that capital to work in the Solana ecosystem.
Right now, the tokens you're holding are probably "wrapped" assets. They aren't the native stablecoins that most Solana DeFi protocols are looking for.
Think of it like showing up in London with US dollars. Sure, it's money, but you can't buy a coffee with it until you exchange it for British pounds. It's the same idea here; your bridged tokens need a quick swap into their local Solana-native form.
Wrapped vs. Native Tokens: Why It Matters
Pop open your Phantom wallet and take a look. You might see a token name like "USDC (Portal)" or "USDT (Wormhole)." That little bit in the parentheses is a dead giveaway—it tells you which bridge the asset came from. It's basically an IOU for the real token that's still locked up back on Ethereum.
Native stablecoins, on the other hand, are issued directly on the Solana blockchain by companies like Circle (for USDC) and Tether (for USDT). These are the real deal, the assets that nearly all decentralized apps (dApps) are built to use. If you try to use wrapped versions, you'll often run into compatibility issues or find there's no liquidity for them.
The final, essential step after any bridge transfer from Ethereum to Solana is to swap your wrapped stablecoins for their native versions. This small action unlocks the full potential of your capital and ensures you can interact seamlessly with Solana's entire DeFi landscape.
Trust me, this is a crucial distinction. I've seen people waste time and a little bit of SOL on failed transactions trying to deposit wrapped USDC into a lending protocol that only accepts the native version. It’s an easy mistake to avoid.
The Final Swap: Going from Wrapped to Native
Thankfully, swapping these tokens on Solana is incredibly cheap and fast. Your go-to tool for this is a decentralized exchange (DEX) aggregator like Jupiter.
Jupiter is fantastic because it scans all the major Solana DEXs—like Orca and Raydium—in an instant to find you the absolute best exchange rate. It saves you the hassle of shopping around.
Here’s how simple it is:
- First, head over to Jupiter and connect your Phantom wallet.
- In the "You're selling" box, find and select your wrapped stablecoin (e.g., "USDC (Portal)").
- In the "You're buying" box, choose the native version of that same coin (it will just say "USDC").
- Finally, double-check the details and hit the "Swap" button. You’ll just need to approve the transaction in your wallet.
In just a few seconds, the wrapped tokens vanish and are replaced by an almost identical amount of native, fully-functional stablecoins. Now you're ready for action.
Putting Your Solana Stablecoins to Work
With native stablecoins in your wallet, the entire Solana ecosystem is at your fingertips. The super-low fees make it the perfect playground for testing out DeFi strategies that would be prohibitively expensive on Ethereum.
So, what are some popular next steps?
- Provide Liquidity: You can deposit your stablecoins into liquidity pools on a DEX to earn a cut of the trading fees. Pools with only stablecoins are a popular choice for generating reliable, lower-risk returns.
- Lending and Borrowing: Platforms like Solend or Kamino let you lend your stablecoins to others to earn interest. You can also use them as collateral to borrow other crypto assets.
- Yield Farming: Many protocols will give you extra rewards for staking the LP (liquidity provider) tokens you get from providing liquidity. This lets you stack yields on top of the trading fees you’re already earning.
These are great starting points for building some passive income streams. For a deeper dive, check out your guide to earning stablecoin yield for strategies you can use across different blockchains. By making that one final swap, you've officially turned your bridged assets into productive capital on one of crypto's most exciting networks.
Answering Your Bridging Questions
Moving assets between blockchains for the first time can feel a bit nerve-wracking. Even with a guide, you're bound to have questions. You're dealing with multiple wallets, different networks, and real money—it's completely normal to want to double-check everything before you click "confirm."
Let's walk through some of the most common questions people have when bridging stablecoins from Ethereum to Solana. My goal is to clear up any confusion so you can move forward with confidence.
How Long Will This Actually Take?
This is the number one question, and the honest answer is: it depends. The total time hinges almost entirely on how busy the Ethereum network is at that moment.
Here's a realistic breakdown of what to expect:
- The Ethereum Leg: This is usually the bottleneck. Getting your transaction confirmed on Ethereum can take 5 to 15 minutes on a good day. If the network is swamped with activity (like during a popular NFT mint), you could be waiting even longer.
- Bridge Processing: Once Ethereum gives the green light, the bridge takes over to mint your new tokens on Solana. This part is much faster, typically wrapping up in another 5 to 10 minutes.
All told, you should probably set aside 10 to 30 minutes for the entire process. Don't just stare at the screen, though. Most good bridges give you a link to a status page where you can track your transfer's progress.
What Happens If My Transaction Gets Stuck?
It’s a heart-sinking feeling to see a "pending" status that won't go away, but don't panic. This is a common issue, and your funds are rarely lost.
If the transaction fails completely on the Ethereum side (usually because you set the gas fee too low), the only thing you lose is the gas fee itself. Your stablecoins will never have left your wallet.
If it’s just stuck, you have options. You can often go into your MetaMask wallet and either speed up the transaction by adding a bit more gas or just cancel it. If the problem happens after the funds leave your wallet but before they land on Solana, the bridge’s support team is your next stop.
Pro Tip: Look for the bridge's official Discord or Telegram channel. Most established projects have active support staff and community members who can help. They'll usually ask for your transaction hash (the ID of your transaction) to look up exactly where your funds are stuck.
Should I Use a Bridge or Just a Centralized Exchange?
This really comes down to what you value more: self-custody or simplicity. There’s no single right answer, just the best fit for your own comfort level.
Using a decentralized bridge like Wormhole is a non-custodial process. That’s a fancy way of saying you—and only you—are in control of your private keys the entire time. For DeFi power users and anyone who lives by the "not your keys, not your crypto" mantra, this is the only way to go.
A centralized exchange (CEX), on the other hand, is undeniably simpler, especially for beginners. The interface feels more like a traditional banking app, and you don't have to deal with smart contracts directly. While it can sometimes be cheaper in terms of fees, it does mean temporarily handing your assets over to the exchange and almost always requires KYC (Know Your Customer) identity verification.
Bottom line: Choose a decentralized bridge for total control and sovereignty. Opt for a CEX if you prefer a simpler, more guided experience.
At Stablecoin Insider, we provide the in-depth analysis you need to understand the mechanics and implications of digital currencies. Stay informed with expert insights at https://stablecoininsider.com.
